In this quick start we use Maven and a few plugins to streamline deploying a very simple Java portlet to Apache Pluto 2
In Java for the anal retentive – Manually deploying a portlet to Apache Pluto we went through the process of creating a simple view-only Java portlet and manually deploying it to Apache Pluto 2 – the reference implementation for JSR 286, the Java Portlet 2.0 specification.
That was the “simplest possible way” in the old school sense of the phrase – the fewest of tools and the maximum of work. While it’s useful to understand how the nuts and bolts go together (essential for some of us) most of us view the phrase “simplest possible way” in rather more of a one-click fashion.
If that’s your idea of simplicity then Maven, with the help of a few plugins, has your back on this one.
Step One: Assemble your ingredients
For this example we’ll again be using JDK 1.7 and Apache Pluto 2.1.0-M3, the latest version at the time of writing. Unlike the last example we’re also using Maven 3.0 to handle our build and our deployment to Pluto.
I’m also using Eclipse Luna (4.4) but this example is pretty much devoid of IDE specifics.
We’re going to use the same “Good Day!” portlet we created previously, a view only portlet which bids the user Good Morning, Good Afternoon or Good Evening depending on the hour of the day.
Step Two: Set up your project
Java portlets are deployed to a Portal Server via a standard Java Web Application Archive (WAR) file, so first of all we are going to set up a Maven project to generate a suitable WAR file.
We’ll kick off with a basic pom.xml file:-
<project xmlns="http://maven.apache.org/POM/4.0.0"
         xmlns:xsi="http://www.w3.org/2001/XMLSchema-instance"
         xsi:schemaLocation="http://maven.apache.org/POM/4.0.0
                             http://maven.apache.org/maven-v4_0_0.xsd">

    <modelVersion>4.0.0</modelVersion>
    <groupId>com.devguerrilla.portlets</groupId>
    <artifactId>good-day-portlet</artifactId>
    <packaging>war</packaging>
    <version>0.0.1-SNAPSHOT</version>
    <name>Good Day Porlet</name>

    <build>
        <finalName>GoodDayPortlet</finalName>
        <plugins>
            <plugin>
                <groupId>org.apache.maven.plugins</groupId>
                <artifactId>maven-compiler-plugin</artifactId>
                <version>3.1</version>
                <configuration>
                    <source>1.7</source>
                    <target>1.7</target>
                </configuration>
            </plugin>
        </plugins>
    </build>

    <dependencies>
        <dependency>
            <groupId>javax.portlet</groupId>
            <artifactId>portlet-api</artifactId>
            <version>2.0</version>
            <scope>provided</scope>
        </dependency>
    </dependencies>

</project>
Our POM defines a project called good-day-servlet which generates a WAR file as a target artefact. Our simple example has one dependency, it needs the portlet API classes to be available when the portlet class is complied. These don’t need to be in the WEB-INF/lib folder of our generated WAR file since the Portal Server will provide them for us. We’re specifically setting the compiler to use JDK 1.7 classes since Pluto 2.1.0-M3 uses a Tomcat 7 version that doesn’t play ball with JDK 1.8 ones.
If we try to use this POM to generate a portlet WAR file for Pluto we’ll hit one speed bump and one brick wall.
The speed bump is that we’re going to have to manually install the WAR file to Pluto once it’s been built. Fortunately there are a few ways we can automate that. Apache’s Deploying Portlet to Pluto Portal page suggests using the maven-antrun-plugin to copy the WAR file into the webapps directory of Pluto’s Tomcat installation. On the plus side this will work whether Pluto is running or not but on the downside it’ll require disk level access to that folder.
Another option which will work wherever your Pluto Portal is running (but does require it to be running) is to use Tomcat’s manager application and its associated maven-tomcat7-plugin to do the deployment. We can do this with the following additional plugin configuration:-
<plugin>
    <groupId>org.apache.tomcat.maven</groupId>
    <artifactId>tomcat7-maven-plugin</artifactId>
    <version>2.2</version>
    <executions>
        <execution>
            <phase>package</phase>
            <goals>
                <goal>deploy</goal>
            </goals>
        </execution>
    </executions>
    <configuration>
        <username>pluto</username>
        <password>pluto</password>
        <path>/GoodDayPortlet</path>
        <update>true</update>
        <url> http://localhost:8080/manager/text</url>
    </configuration>
</plugin>
We’re binding the deploy goal to the package phase here, so a package or install Maven run will do the deployment for us. At a minimum we need to provide a username and password in the <configuration/> section, but here I’m also specifying the path which otherwise would take the artefact name (/good-day-servlet). Setting update to true allows it to redeploy our WAR file if it’s already there. Finally the URL of the manager’s scripting interface is specified (though since I’m using the default URL here I could have omitted it).
Well, that’s the speed bump taken care of, but what about the brick wall?
The web.xml in our WAR file needs some Pluto specifics adding to it in order for it to run properly in the Pluto server. If we run the above build as it is, the WAR file will deploy successfully but Pluto won’t be able to see the portlets it contains.
Since we’re unlikely to be using Pluto in production we’re unlikely to want these Pluto specifics in our code base, but we can use maven-pluto-plugin in our POM to add them to the generated web.xml as part of the build:-
<plugin>
    <groupId>org.apache.portals.pluto</groupId>
    <artifactId>maven-pluto-plugin</artifactId>
    <version>2.1.0-M3</version>
    <executions>
        <execution>
            <phase>generate-resources</phase>
            <goals>
                <goal>assemble</goal>
            </goals>
        </execution>
    </executions>
</plugin>
<plugin>
    <groupId>org.apache.maven.plugins</groupId>
    <artifactId>maven-war-plugin</artifactId>
    <version>2.5</version>
    <configuration>
        <webXml>
            ${project.build.directory}/pluto-resources/web.xml
        </webXml>
    </configuration>
</plugin>
There are a couple of things going on here. First of all we’re including the maven-pluto-plugin and associating the assemble goal with the generate-resources phase of the Maven build. This creates a modified web.xml for us but locates it under target/pluto-resources/web.xml, hence we also need to add some configuration for the maven-war-plugin to tell it to pick up the modified web.xml when building the WAR file.
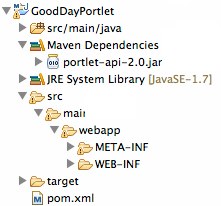
That’s our POM file finished, we now just need to set up the standard directories for a Maven web application project and we can get on with coding it.
Step Three: Write your portlet
Under src/main/java I’m going to create a package called com.devguerrilla.portlets and add a class called GoodDayPortlet which extends javax.portlet.GenericPortlet. Here’s what my simple portlet looks like:-
package com.devguerrilla.portlets;

import java.io.IOException;
import java.text.SimpleDateFormat;
import java.util.Date;

import javax.portlet.GenericPortlet;
import javax.portlet.PortletException;
import javax.portlet.RenderRequest;
import javax.portlet.RenderResponse;

public class GoodDayPortlet extends GenericPortlet {

    @Override
    protected void doView(RenderRequest request, RenderResponse response)
            throws PortletException, IOException {
        int hourOfDay = Integer.valueOf(new SimpleDateFormat("HH").
                format(new Date()));
        String goodDayMessage = "Good " +
                (hourOfDay < 12 ? "Morning" :
                 hourOfDay > 17 ? "Evening" : "Afternoon") + " " +
                (request.getRemoteUser() != null ?
                         request.getRemoteUser() : "you");
        response.getWriter().write(goodDayMessage);
    }
}
This is exactly the same simple portlet we created in the previous post, which works out an appropriate greeting based on the time of day and squirts it out through the RenderResponse object’s Writer. Since our simple portlet is only going to support view mode, doView() is the only method we need to override.
Step Four: Add your deployment descriptors
Like all good WAR files ours will need a web.xml file, which we will stick under src/main/webapp/WEB-INF. This isn’t the file that describes our portlets but is used to configure any webapp-wide resources we may need, such as supporting servlets or security roles. Since we don’t need any of these for this example, our web.xml is pretty trivial:-
<?xml version="1.0" encoding="UTF-8"?>
<web-app xmlns:xsi="http://www.w3.org/2001/XMLSchema-instance"
         xmlns="http://java.sun.com/xml/ns/javaee"
         xmlns:web="http://java.sun.com/xml/ns/javaee/web-app_2_5.xsd"
         xsi:schemaLocation="http://java.sun.com/xml/ns/javaee
                 http://java.sun.com/xml/ns/javaee/web-app_3_0.xsd"
        version="3.0">

    <display-name>Good Day Portlet</display-name>
    <description>A portlet to wish you good day</description>

</web-app>
Note that it’s also rather different from the one in the previous post, where we had to define a servlet to connect our portlet into Pluto. This time Pluto’s Maven plugin will do that work for us.
Next we need a portlet.xml, also under the WEB-INF folder, to describe our portlet.
<?xml version="1.0" encoding="UTF-8"?>
<portlet-app
        xmlns="http://java.sun.com/xml/ns/portlet/portlet-app_2_0.xsd"
        xmlns:xsi="http://www.w3.org/2001/XMLSchema-instance"
        xsi:schemaLocation="
            http://java.sun.com/xml/ns/portlet/portlet-app_2_0.xsd
            http://java.sun.com/xml/ns/portlet/portlet-app_2_0.xsd"
        version="2.0">

    <portlet>
        <portlet-name>GoodDayPortlet</portlet-name>
        <display-name>Good Day Portlet</display-name>
        <portlet-class>
            com.devguerrilla.portlets.GoodDayPortlet
        </portlet-class>
        <supports>
            <mime-type>text/html</mime-type>
            <portlet-mode>VIEW</portlet-mode>
        </supports>
        <portlet-info>
            <title>Good Day!</title>
        </portlet-info>
    </portlet>

</portlet-app>
This is the same as in the previous post; we’re giving our portlet a name, a window title and telling the container what implementation class to use and what modes it supports.
Finally we need to add a context.xml file under src/main/webapp/META-INF to enable the crossContext setting for our deployed application. This is a Pluto specific requirement and about as simple as can be to fulfil:-
<Context path="/GoodDayPortlet"
         docBase="GoodDayPortlet"
         crossContext="true">
</Context>
Step Five: Build and deploy your portlet
Now for the easy part. Since our Maven POM file has the necessary plugins to prepare our WAR file for deployment to Pluto and actually deploy it, all we need to do here is run a build.
Well, almost!
Because we’re deploying via Tomcat’s manager application we’ll need to ensure Pluto is running when we do our build, but before we do that we need to check conf/tomcat-users.xml in our Pluto installation and ensure that the pluto user has the manager-script role added, otherwise it won’t have permissions to push our WAR file via the plugin:-
<user name="pluto" password="pluto" roles="pluto,manager,manager-script"/>
Now we can start Pluto:-
$ ./pluto-2.1.0-M3/bin/startup.sh
And run our Maven build from the root of our project directory (or fire it off from our IDE):-
$ mvn package
And Presto!
..
[INFO] tomcatManager status code:200, ReasonPhrase:OK
[INFO] OK - Deployed application at context path /GoodDayPortlet
[INFO] --------------------------------------------------------------
[INFO] BUILD SUCCESS
[INFO] --------------------------------------------------------------
…
Our WAR file is deployed and the Portlet ready to use on a test page
Step Six: Your portlet in action
Putting our portlet on a Pluto portal page at this point proceeds by precisely the same process as the previous post (once I’ve wiped the spit of my screen that is!)
We simply need to login to Pluto (usually at http://localhost:8080/pluto/portal) with the username pluto and password pluto and then click on the Pluto Admin page. This shows us the Pluto Page Administrator panel where we first add a “My Test Page” in the Portal Pages section, then select it from the drop down list of pages, choose GoodDayPortlet in the Portlet Applications section and click the Add Portlet button.

Presto! Our portlet is now placed on a Pluto portal page and our POM provides the process to progress our programming painlessly.
Dammit! Where’s that cloth…