If you’re just starting to find your feet with Java portlets and want to understand how they hang together with the Apache Pluto reference implementation, here we deploy about the simplest portlet possible in about the simplest possible way.
Being a bit of an anal retentive control-freak (by the way ladies, I am single … wink, wink) I find I work most comfortably when I understand exactly how things hang together. Cushy build tools make our lives a hell of a lot easier and I love using them, but when shit stops hanging together I like to be able to work out why and get on with my job.
So, while doing some work with Java portlets recently, I decided to go back to first principles, throw the build tools out of the window and try to deploy the simplest possible portlet to the Apache Pluto reference implementation for JSR 286.
Here’s how to do it.
Step one: Assemble the ingredients
For this example I’m using JDK 1.7 and Apache Pluto 2.1.0-M3 – the latest version of the reference implementation for the Java Portlet 2.0 specification – along with the Eclipse IDE.
If you want to try this with Java 8, don’t. Or if you do you’ll need to configure your build settings to use 1.7 class files as this Pluto version embeds a Tomcat 7 build that doesn’t like Java 8 class files. You’ll end up with messages like these in catalina.out if you try to use Java 8 classes:-
Oct 10, 2014 7:28:18 PM org.apache.catalina.core.ContainerBase addChildInternal
SEVERE: ContainerBase.addChild: start:
org.apache.catalina.LifecycleException: Failed to start component
    [StandardEngine[Catalina].StandardHost[localhost].StandardContext
    [/GoodDayPortlet]]
    at org.apache.catalina.util.LifecycleBase.start(
        LifecycleBase.java:152)
    at org.apache.catalina.core.ContainerBase.addChildInternal(
        ContainerBase.java:812)
    …
Caused by: org.apache.tomcat.util.bcel.classfile.ClassFormatException:
        Invalid byte tag in constant pool: 15
    at org.apache.tomcat.util.bcel.classfile.Constant.readConstant(
        Constant.java:131)
    at org.apache.tomcat.util.bcel.classfile.ConstantPool.<init>(
        ConstantPool.java:60)
Step two: Set up your project
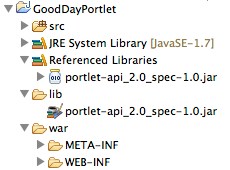
One or more portlets are deployed into a Portal Server via a web application archive (WAR) file and follow the usual standards for these files. Since I’m keeping it simple in the old school sense for this example, I’ve configured my Eclipse project structure to match the WAR file I want to create. I’ve got a src folder to contain my Java source code and my output folder set to war/WEB-INF/classes. I’ll edit my deployment descriptors in-place in the WEB-INF folder.
Java portlets require a number of standard interfaces and classes specified in JSR 286 and if you think you’ll find them in the standard or enterprise Java packages on Oracle’s web-site, think again. You’re going to need to pull portlet-api_2.0_spec-1.0.jar from the Pluto distribution and add it to your build path. It’s the only dependency we need for this example.
Step three: Write your portlet
My simplest possible portlet will greet the user with a Good Morning, Good Afternoon or Good Evening message, depending on the time of day.
Portable portlets support up to three display modes – View, Edit and Help – with View the only one that’s required. Therefore for this example, View is the only mode I’m going to support. The GenericPortlet base class is a good one to extend for most portlets and offers everything I need here by simply overriding the doView() method:-
package com.devguerrilla.portlets;

import java.io.IOException;
import java.text.SimpleDateFormat;
import java.util.Date;

import javax.portlet.GenericPortlet;
import javax.portlet.PortletException;
import javax.portlet.RenderRequest;
import javax.portlet.RenderResponse;

public class GoodDayPortlet extends GenericPortlet {

    @Override
    protected void doView(RenderRequest request, RenderResponse response)
            throws PortletException, IOException {
        int hourOfDay = Integer.valueOf(
                new SimpleDateFormat("HH").format(new Date()));
        String goodDayMessage = "Good " +
                (hourOfDay < 12 ? "Morning" :
                 hourOfDay > 17 ? "Evening" : "Afternoon") + " " +
                (request.getRemoteUser() != null ?
                 request.getRemoteUser() : "you");
        response.getWriter().write(goodDayMessage);
    }
}
We’re just rendering some simple text so it is enough for us to just get a Writer from the response object and squirt our text through it via its write method.
Step four: Add in your deployment descriptors
First up, a portlet WAR file needs a portlet.xml file in the WEB-INF folder that describes all the portlets it offers. Here’s mine:-
<?xml version="1.0" encoding="UTF-8"?>
<portlet-app
        xmlns="http://java.sun.com/xml/ns/portlet/portlet-app_2_0.xsd"
        xmlns:xsi="http://www.w3.org/2001/XMLSchema-instance"
        xsi:schemaLocation="
            http://java.sun.com/xml/ns/portlet/portlet-app_2_0.xsd
            http://java.sun.com/xml/ns/portlet/portlet-app_2_0.xsd"
        version="2.0">
    <portlet>
        <portlet-name>GoodDayPortlet</portlet-name>
        <display-name>Good Day Portlet</display-name>
        <portlet-class>
            com.devguerrilla.portlets.GoodDayPortlet
        </portlet-class>
        <supports>
            <mime-type>text/html</mime-type>
            <portlet-mode>VIEW</portlet-mode>
        </supports>
        <portlet-info>
            <title>Good Day!</title>
        </portlet-info>
    </portlet>
</portlet-app>
Our portlet has a name and an associated implementation class. We’re telling the container that we only support the VIEW display mode and we’ve also provided a resource bundle string in portlet-info for the title to be displayed on the portlet’s window. If you miss this out with Pluto and don’t override GenericPortlet’s getTitle() method you’ll get errors like these when you try to display it:-
java.util.MissingResourceException: Can't find resource for bundle
        org.apache.pluto.driver.container.InlinePortletResourceBundle,
        key javax.portlet.title
    at java.util.ResourceBundle.getObject(ResourceBundle.java:395)
Next up we need a web.xml file. This defines any web application level resources, such as other servlets, that our portlet bundle needs and here we hit a little niggle with how Pluto manages portlets:-
<?xml version="1.0" encoding="UTF-8"?>
<web-app
        xmlns:xsi="http://www.w3.org/2001/XMLSchema-instance"
        xmlns="http://java.sun.com/xml/ns/javaee"
        xmlns:web="http://java.sun.com/xml/ns/javaee/web-app_2_5.xsd"
        xsi:schemaLocation="http://java.sun.com/xml/ns/javaee
             http://java.sun.com/xml/ns/javaee/web-app_3_0.xsd"
        version="3.0">
    <display-name>Good Day Portlet</display-name>
    <description>A portlet to wish you good day</description>

    <servlet>
        <servlet-name>GoodDayPortlet</servlet-name>
        <servlet-class>
            org.apache.pluto.container.driver.PortletServlet
        </servlet-class>
        <init-param>
            <param-name>portlet-name</param-name>
            <param-value>GoodDayPortlet</param-value>
        </init-param>
        <load-on-startup>1</load-on-startup>
    </servlet>

    <servlet-mapping>
        <servlet-name>GoodDayPortlet</servlet-name>
        <url-pattern>/PlutoInvoker/GoodDayPortlet</url-pattern>
    </servlet-mapping>

</web-app>
For each portlet in our bundle we need to provide a PlutoInvoker servlet in order for Pluto to see it and be able to pass requests to it. It might seem a little bit odd that the reference implementation requires implementation specific content in the web.xml file but to be fair, when using its build tools such as the Maven plugin, it will add these bits for you so your source code can stay implementation specifics free.
Finally we need to add a context.xml file in the META-INF folder of our WAR file, the main reason for which is to set the crossContext flag for the application. Again this is a Pluto specific step:-
<Context path="/GoodDayPortlet"
         docBase="GoodDayPortlet"
         crossContext="true">
</Context>
Step five: Deploy to Pluto
We could copy the contents of our WAR file into the webapps folder of our Pluto installation in order to deploy it but instead I’m going to create a WAR file and deploy it via Plluto’s web interface:-
$ jar cvf ../GoodDayPortlet.war *
added manifest
ignoring entry META-INF/
adding: META-INF/context.xml(in = 89) (out= 67)(deflated 24%)
adding: WEB-INF/(in = 0) (out= 0)(stored 0%)
adding: WEB-INF/classes/(in = 0) (out= 0)(stored 0%)
adding: WEB-INF/classes/com/(in = 0) (out= 0)(stored 0%)
adding: WEB-INF/classes/com/devguerrilla/(in = 0) (out= 0)(stored 0%)
adding: WEB-INF/classes/com/devguerrilla/portlets/(in = 0) (out= 0)(stored 0%)
adding: WEB-INF/classes/com/devguerrilla/portlets/GoodDayPortlet.class(in = 1644) (out= 882)(deflated 46%)
adding: WEB-INF/portlet.xml(in = 746) (out= 311)(deflated 58%)
adding: WEB-INF/web.xml(in = 940) (out= 396)(deflated 57%)
Pluto ships as a Tomcat installation containing the Pluto web application. It supports Tomcat’s manager application to allow you to manage portlet deployments via a web browser. Unfortunately the version I’m using doesn’t grant the pluto user permissions to login to Tomcat’s manager web application. To get around this we need to edit conf/tomcat-users.xml and change
<user name="pluto" password="pluto" roles="pluto,manager" />
To:-
<user name="pluto" password="pluto" roles="pluto,manager,manager-gui" />
Next up, we start Pluto:-
$ ./pluto-2.1.0-M3/bin/startup.sh
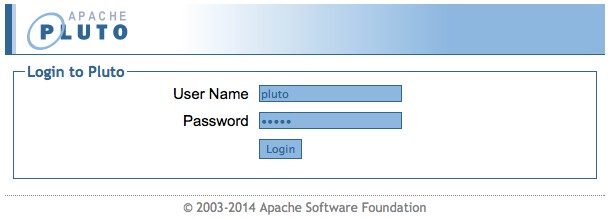
And login to it via http://localhost:8080/pluto with user pluto and password pluto:-
On the Pluto Admin page, at the bottom of the Pluto Page Administrator panel, clicking the Upload and deploy a new portlet war link takes us to Tomcat’s manager application page where we can upload our new WAR file:-

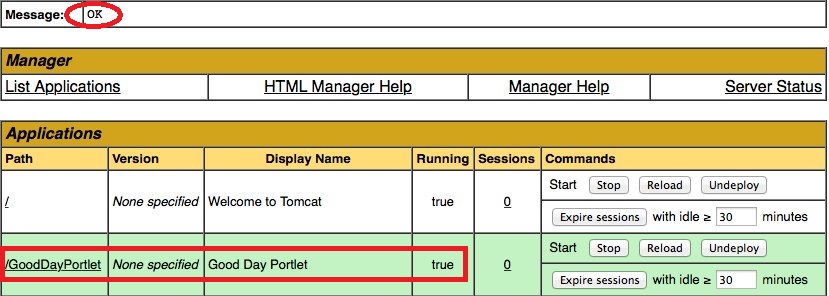
And check that it was successfully deployed and started:-
Step six: Add your Portlet to a test page
We’re almost there. All we need to do now is create a test page and add our portlet to it.
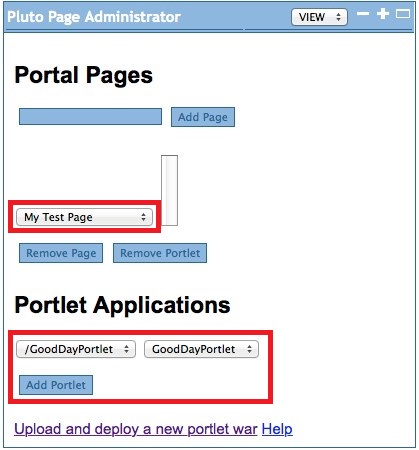
Log back into Pluto (there’s no need to restart it) and go back to the Pluto Admin page. In the Pluto Page Administrator panel enter the name for a new page and click Add Page:-
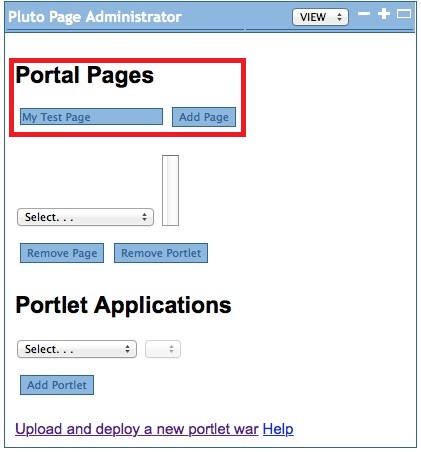
Now we select the page, select our portlet and click Add Portlet:-
And job done, click over to our My Test Page tab and we can see our new portlet in all its glory:-